
A Free Crochet Pattern – Blue Ticking is an age old named fabric pattern. The color was typically dark navy blue stripes with alternating cream or off-white or ivory stripes. however, for this project, I used a yarn mixture of white shades I had in my leftover collection; all from other projects over the past years. Also, choose whether you want to create a throw, a blanket or simply a table runner. That will determine the amount of yarn you will need.
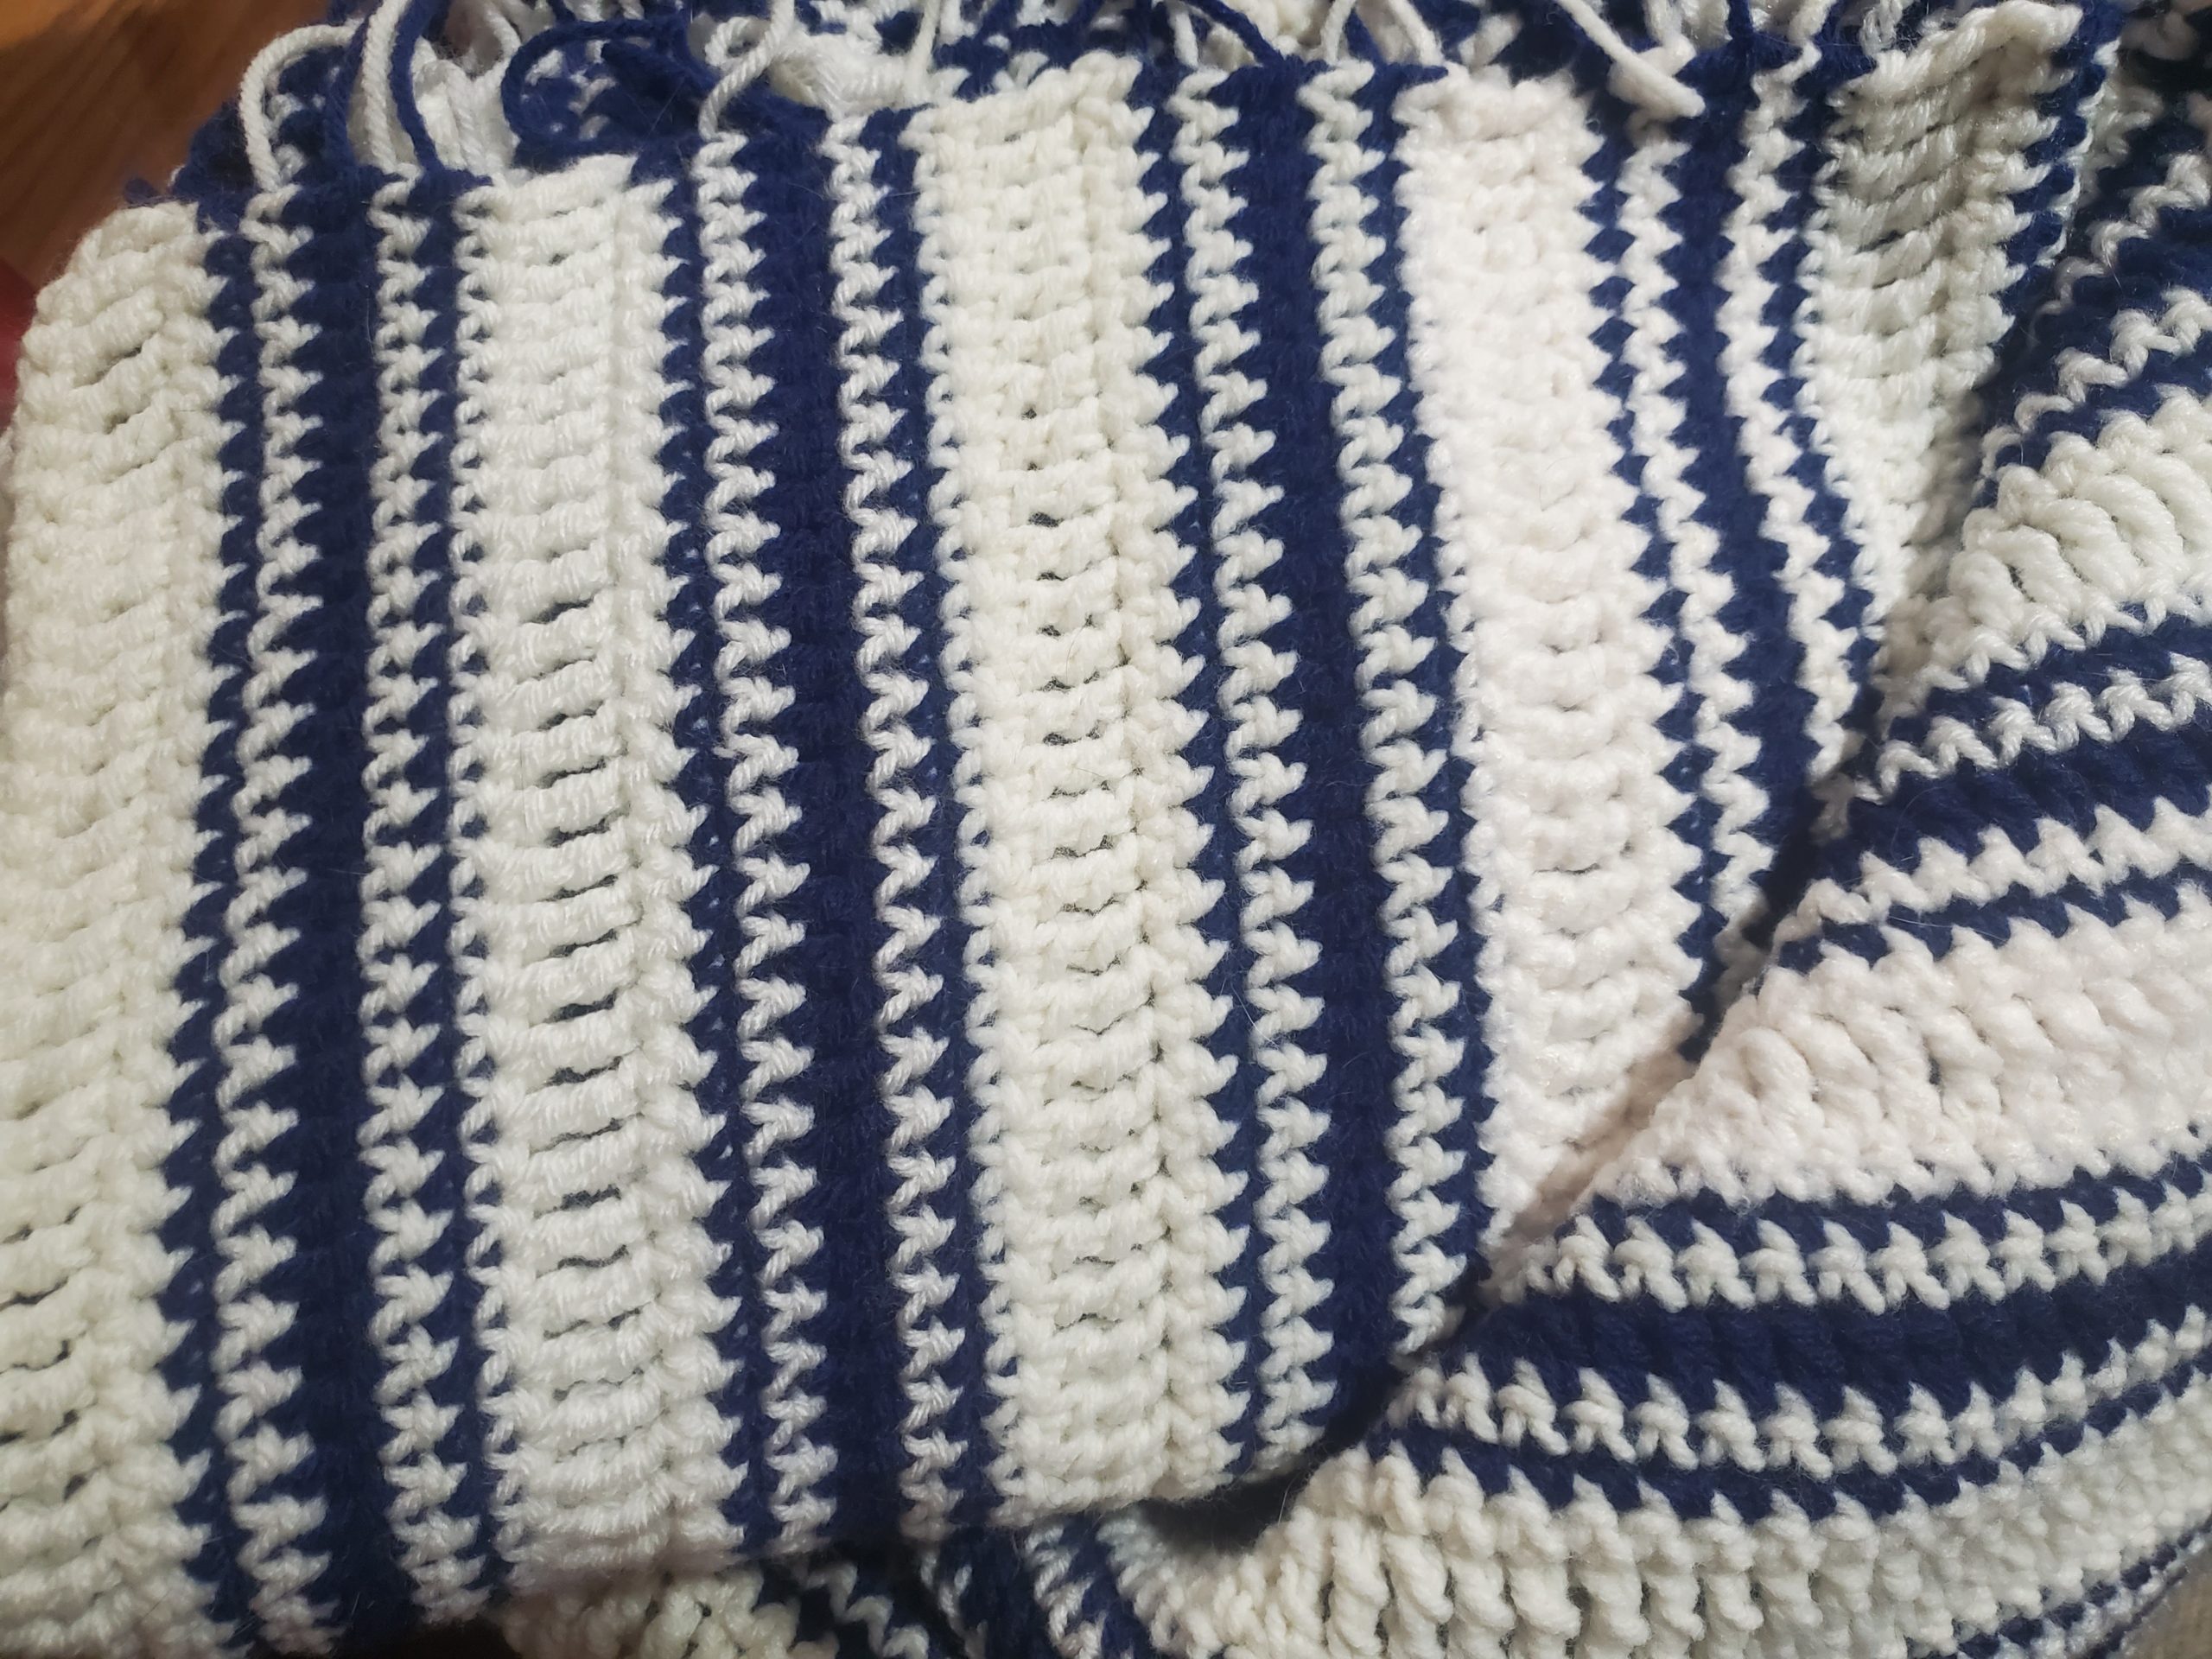
Now, of course, the inspiration came from a swatch of antique fabric I purchased at an antique mall for just a few dollars. I was recently going thru and organizing, along with separating, my yarn and fabric swatches. That, along with the fact I am constantly looking for easy patterns that look amazing and yet somewhat artistic; So, creating my own crochet pattern was pretty easy, especially when sticking to the basic crochet stitches and having only two basic colors, navy blue and some creamy shade of white.
Easy peasy, right? Well, with that said, let’s start with this simple pattern I created, even for beginners! The pattern is done on the horizontal, instead of the normal vertical, like with most other crochet patterns. So, we will start with the length of the blanket as we build up the width (where we would normally start our pattern). And, it’s so easy to learn this pattern. Also, you can create this in any size you choose.
Free Crochet Pattern – What you need to Get Started
Basic Stitches Used:
- ch = chain
- sc =single crochet
- dc = double crochet
- tr = treble crochet
Materials Needed:
- medium weight worsted yarn
- crochet hook size H (5.0mm)
- 1 or 2 jumbo skein soft navy (red heart brand) {color B going forward}
- 3 – 4 skeins of same varied shade of cream {color A going forward}
Let’s start by chaining (ch) 250 with color A. Turn.
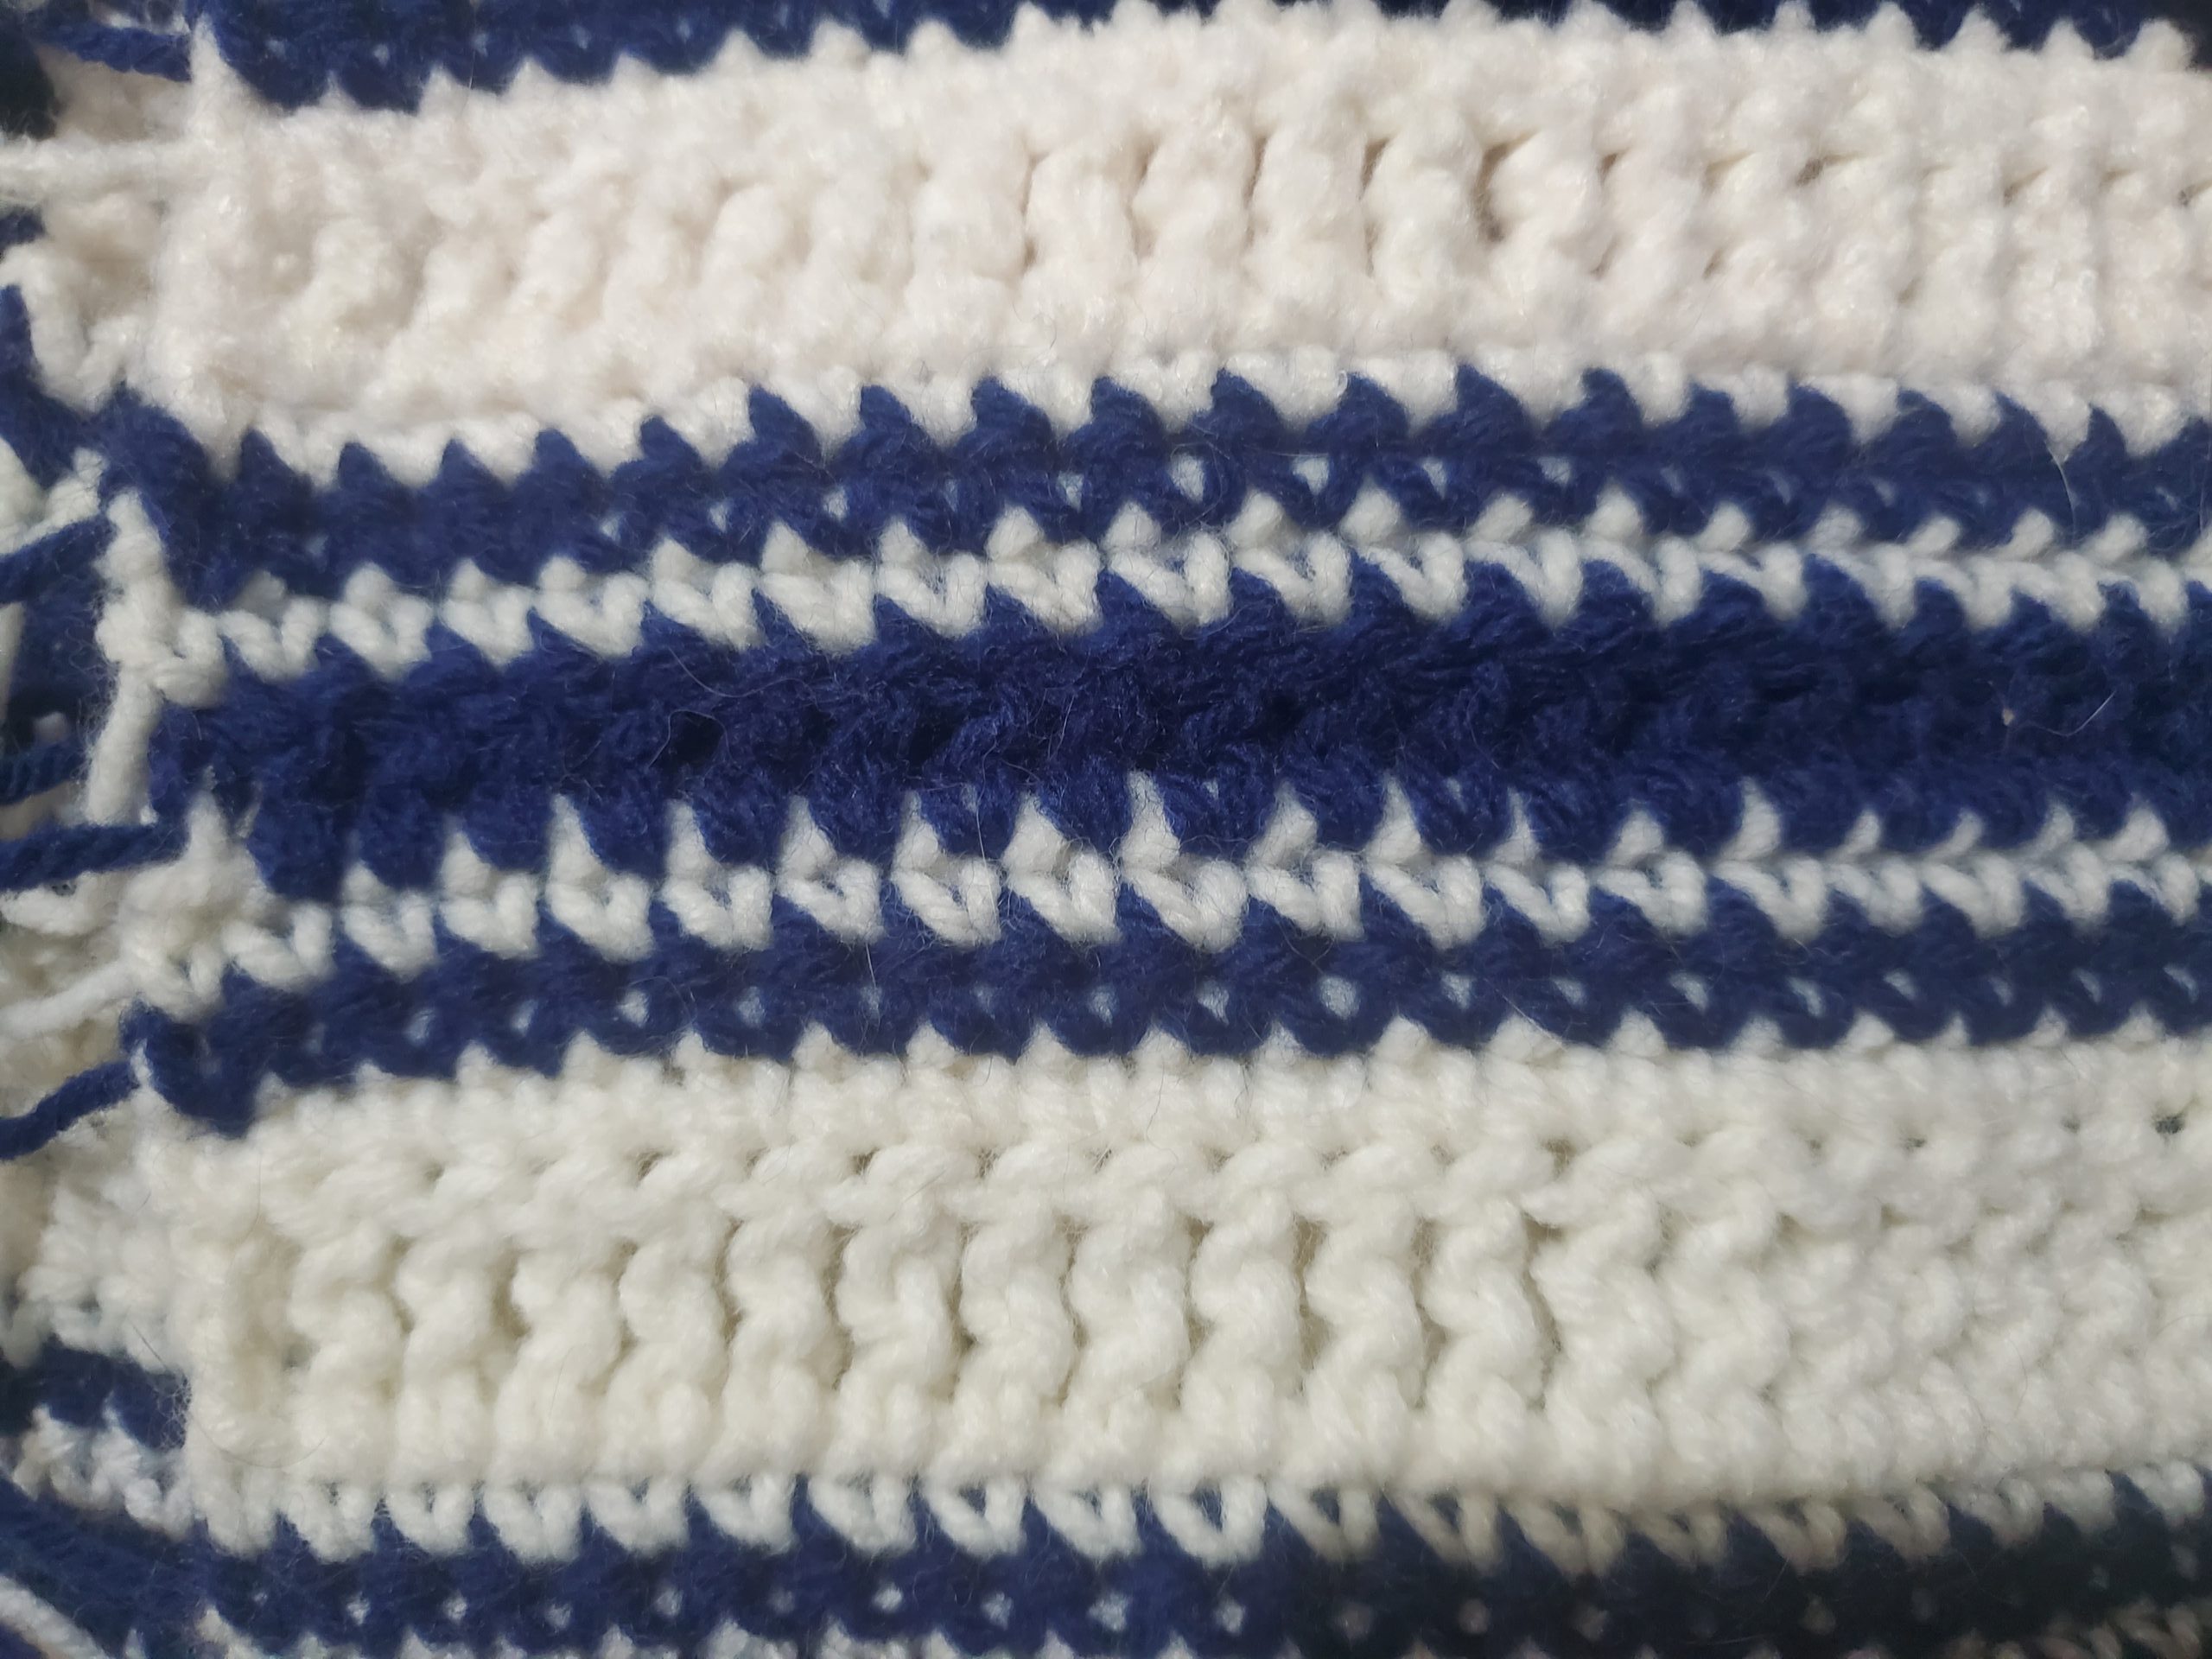
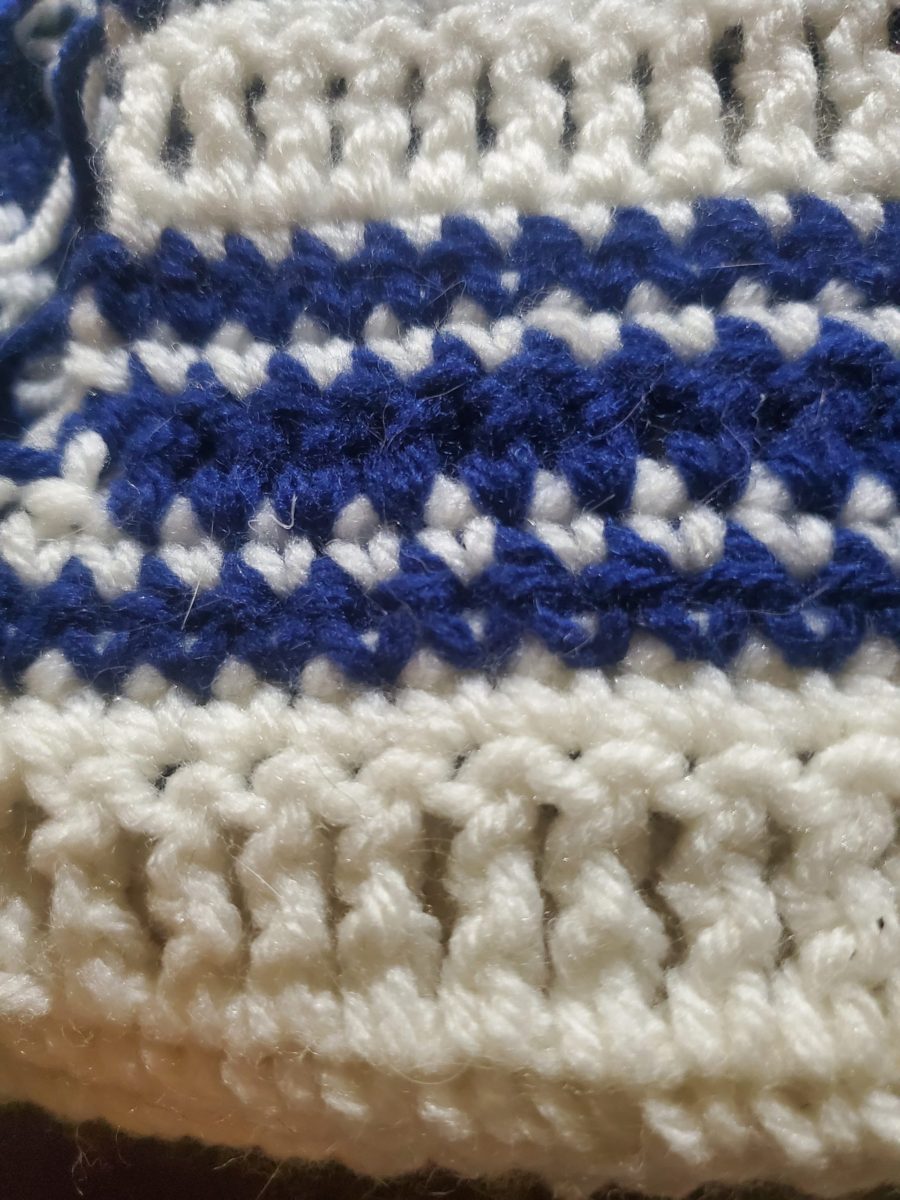
Row 1 ~ Count 1 (ch) skip and (sc) in second (ch) from hook. (sc) in each (ch) across to end of row. (ch) 3, turn.
Row 2 ~ (tr) in each (sc) from row 1 across to the end of the row. (ch) 1, turn.
Row 3 ~ (sc) in each (tr) stitch (from row 2) all the way across to end of the row. [Do Not (ch) yet.]
~ COLOR CHANGE ~ Now is where we will change from color A to color B or vice versa While holding loop on hook at the end of the row, wrap a loop of color B and pull thru color A loop. then (ch) 1 with color B. Always Leave a 3″ to 4″ tail and cut off color A. Turn. NOTE: (ch) 1 may change amounts depending on the row.
Row 4 ~ now with color B, (sc) in each (sc) stitch (from row 3) all the way across to end of the row. {Color change from color B back to color A} then (ch) 1. Turn.
Row 5~ with color A, (sc) in each (sc) stitch (from row 4) all the way across to end of the row. {Color change from color A back to color B} then (ch) 2. Turn.
Row 6 ~ with color B, (dc) in each (sc) stitch (from row 5) all the way across to end of the row. {Color Change from color A back to color B} then (ch) 1. Turn.
Row 7 ~ with color A, (sc) in each (dc) stitch (from row 6) all the way across to end of the row. {Color change from color B back to color A} then (ch) 1. Turn.
Row 8~ with color B, (sc) in each (sc) stitch (from row 7) all the way across to end of the row. {Color change from color A back to color B} then (ch) 1. Turn.
Rows 9 thru 72 ~ continue back at Row 1 thru Row 8 in repeating pattern 8 more times (72 rows in total). When you get to the end, (ch) 1, cut off yarn, leaving 3″- 4″ tail, then pull loop thru on hook.
Finishing ~
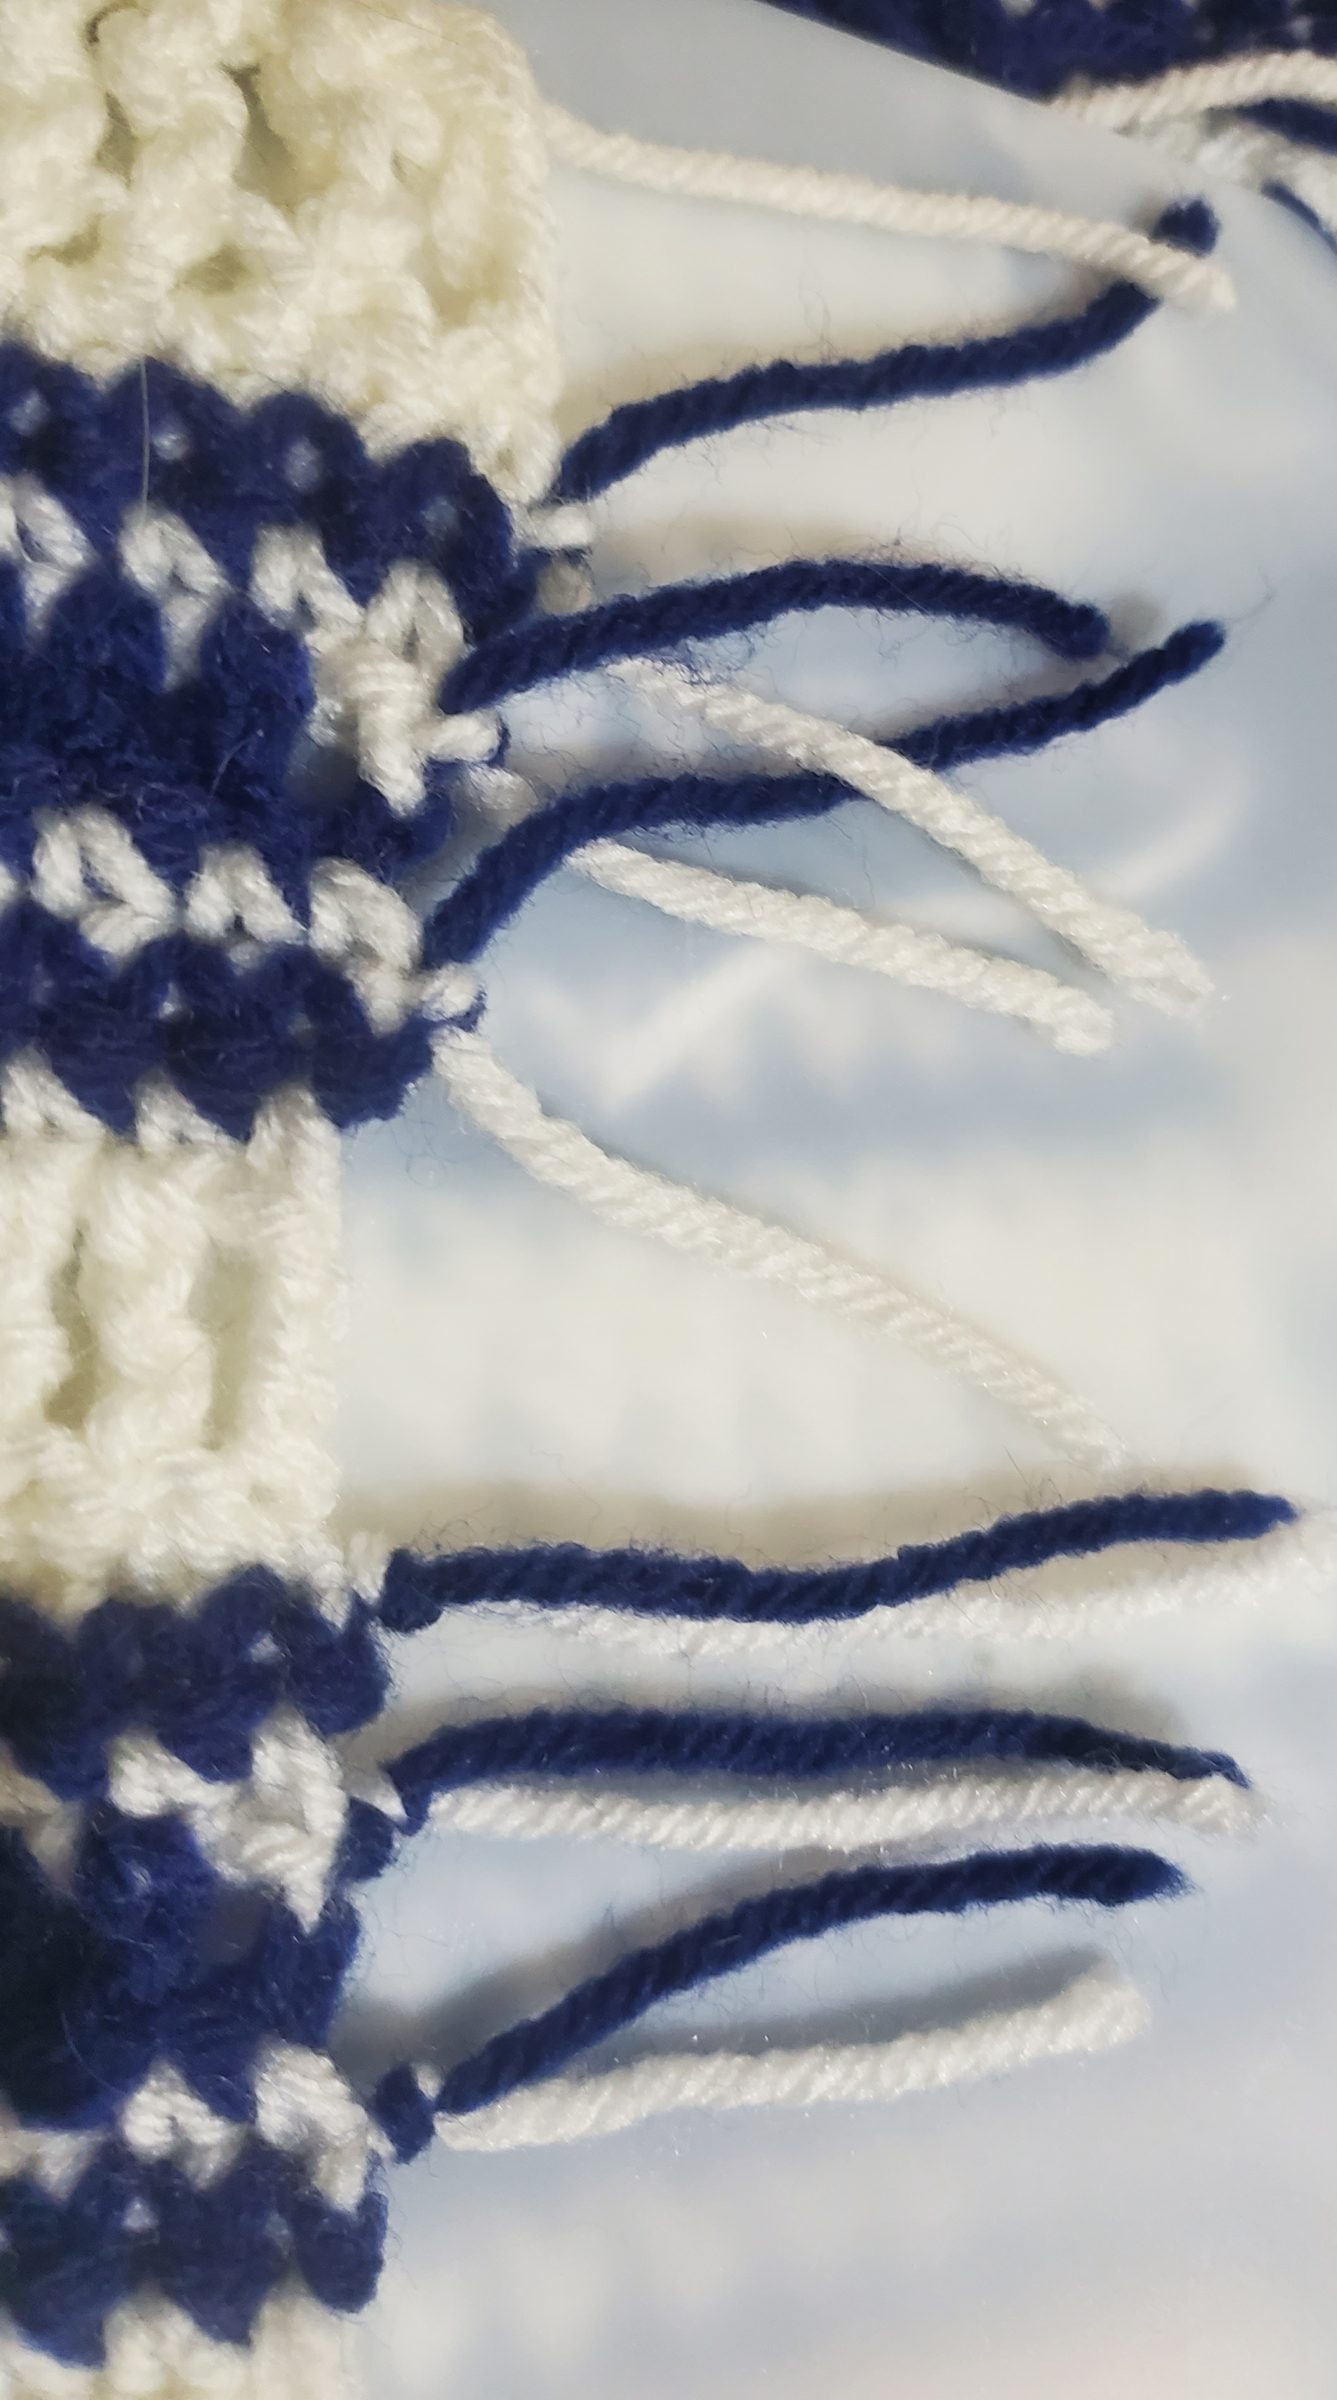
Finally we need to do something with all the raw edges we created from each color change. Before tying your strands together, pull them first to tighten. Also, we have a few choices or finishes here to choose from:
Example 1 ~ The top few yarn strands, in the picture, were tied with every two strands into a regular knot.
Example 2 ~The bottom yarn strands were held together and wrapped in a knot, 2 strands of yarn at the time.
For this project I prefer the example 1 the most, because they look more like the original Blue Ticking fabric and how it unravels at the ends. Although, the example 2 is a more streamline and not as messy looking. But, both are great to use for future projects as well. Now, go around entire throw and tie all yarn strands. If only a single strand left, tie in a knot close to stitch.
I hope you enjoyed this easy Free Crochet Pattern! I had so much fun creating it. Also, if you do like it, try out my Textile Art Gallery of Koni’s Fiber Art Collection! I have many more projects to add there going forward. Just stay tuned! Thank you for stopping by and checking out my site here at 2g86.com.
